
Items used in Cover Tutorial
Photoshop CS and Poser
July 2009 Cover TutorialNow that we have finished applying the Gaussian Blur to the character, it is now time to work on the background. There are two things that Gaussian Blur will do for the image. It will add depth to your art and it will bring more attention to the character. |
|
| Step 7 : We used the “Dream Home: Great Room” 3D model for our background. Make sure that your background image is on the bottom layer, and then apply a 6.4 Gaussian Blur to the Great Room background image. The blur should create a similar effect to the image on the right. |  |
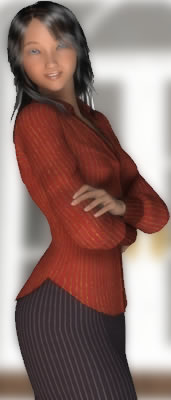
Step 8 : Make sure that the Background layer is on the bottom and your Character layer is on the top. The finished image will look similar to the image on the left. The best thing about Gaussian Blur is that there is no one setting to use. You will always have an option of how much Gaussian Blur is required for each 3D art project that you are working on.
|
 |
Postwork Required:
Gaussian Blur
