Step 1 : Open the Aiko 3 Base Character (don't have it? Get it here) |
|
 |
|
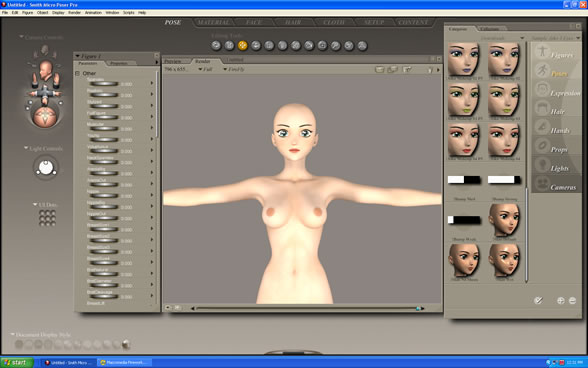
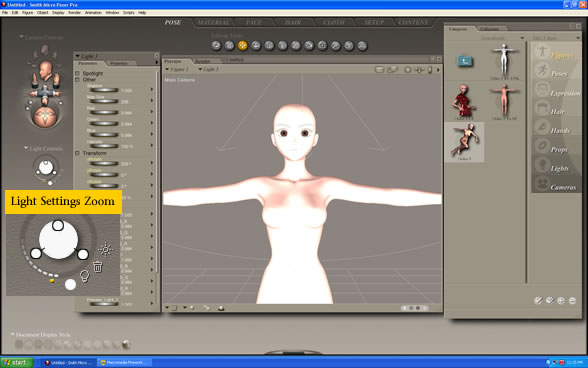
In this Poser tutorial we are going to use the Aiko 3 base model, the Aiko 3 Morphs and Maps, and the Mitsu Hair for Aiko 3. After opening the Aiko 3 base we adjust our light settings for a better rendering. We used 3 white light settings in a triangle formation since we want to keep this tutorial as simple as possible. We recommend that you use a limited amount of lighting at the start in order to speed up the work process. This tutorial will also talk a little bit about character creation. In the image above you can see that our Aiko 3 model looks very bright and is missing skin details, this is ok since things will change once we apply the Aiko 3 maps. Your Aiko 3 model should look similar to ours if you are using a similar light setting. Now we are ready to add the Aiko 3 material map
|
|
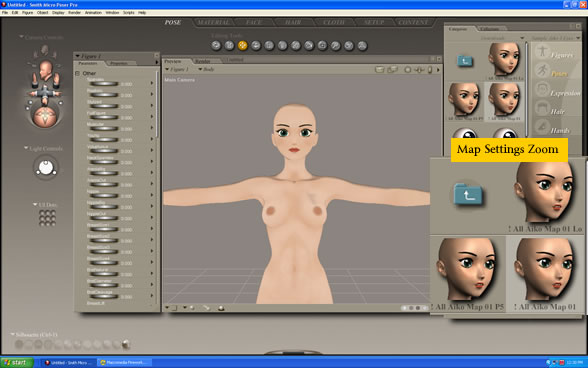
| Step 2 : Add the Aiko 3 Material Map | |
 |
|
Add Aiko 3 Material Map by double clicking on one of the map settings as show in the image above. We selected the "! All Aiko Map 01." Your Aiko 3 should look very similar to the image above. Your render will look similar to the image below if you are using the 3 lights in a triangle formation.
|
|
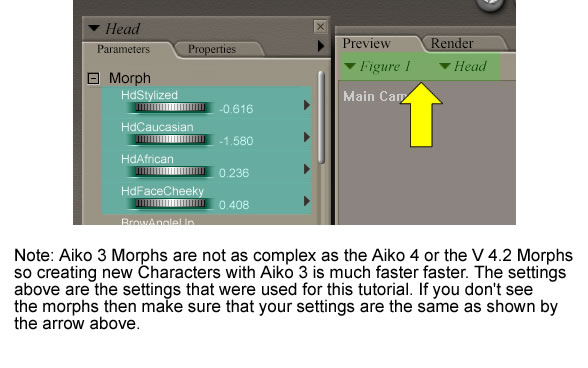
| Step 3 : Character Creation (Requires Aiko 3 Morphs) | |
 |
|
If you do not have the Aiko 3 Morphs then you can skip to the next step. If you are interested in creating your own characters then you'll need to purchase the morph for the base that you are working with. It is highly recommended that you purchase a Morph for at least one of the bases that you own. This will allow you to create multiple characters in various art styles from anime to realism. Having the morphs saves you money in the long run. It is also required for many of the characters that are sold. When you use the Aiko 3 morphs you'll notice right away that the slightest adjustments change the appearance of your base model.
|
|
| Step 4 : Add the Mitsu Hair | |
 |
|
The image above is a Rendered Version after we added the Mitsu Hair. Our Aiko 3 character looks a little different from the aiko at the start and we only have to change the skin color of our Aiko 3. Sometimes you can change the skin color by changing the color of the lights but you only want to do this if you want to give the appearance of different colored lights shining on the object. In order to create a different ethnic character then you'll have to use Poser's Material room to make the necessary changes. This is our next step |
|
| Page 1, 2 | |